
How to find and install your Facebook pixel
My recent post – Should you have a Facebook pixel on your website – has proved to be a great resource to share, as I’m asked that question so frequently. However, it has also highlighted another area that needs clarifying…
One of my mastermind buddies messaged me this weekend – “How do I find the stupid Facebook pixel. I’ve watched approximately 50 tutorials on YouTube and none of them look like my Facebook Ads Manager.” I think she “may” have been exaggerating, but nonetheless, it sounds like there’s a need for some help with this issue.
It is something I cover in detail in my Getting Started With Facebook Ads Course, complete with a video, but this blog will also provide a concise run through of how to locate and install your pixel.
Where to find the Facebook pixel in Ads Manager
Click the “nine dots” menu by the Ads Manager title in the left hand corner and this will open up all your shortcuts. From there, you are heading into Events Manager.
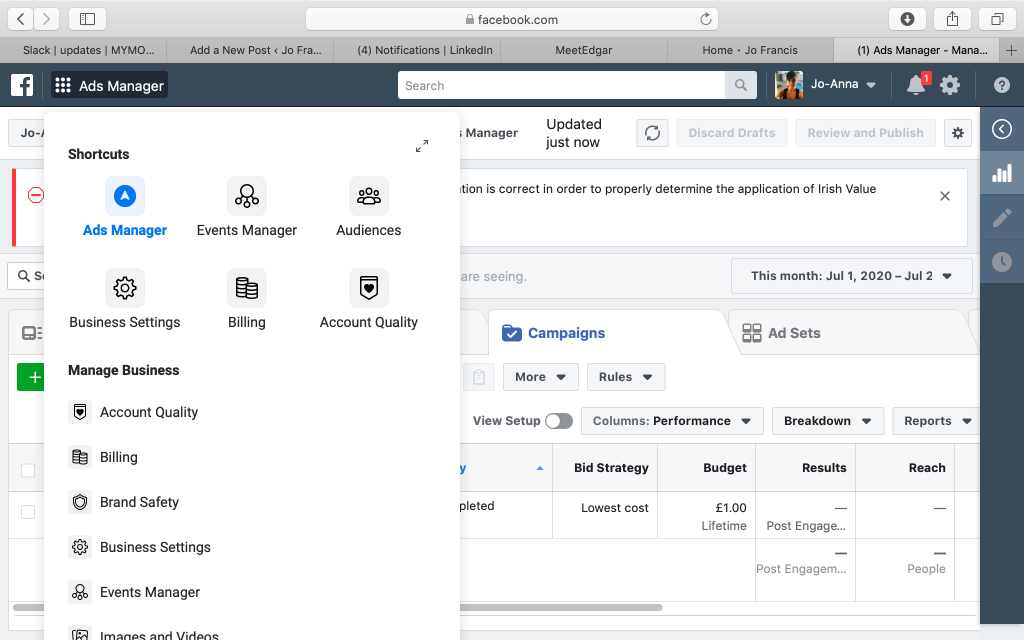
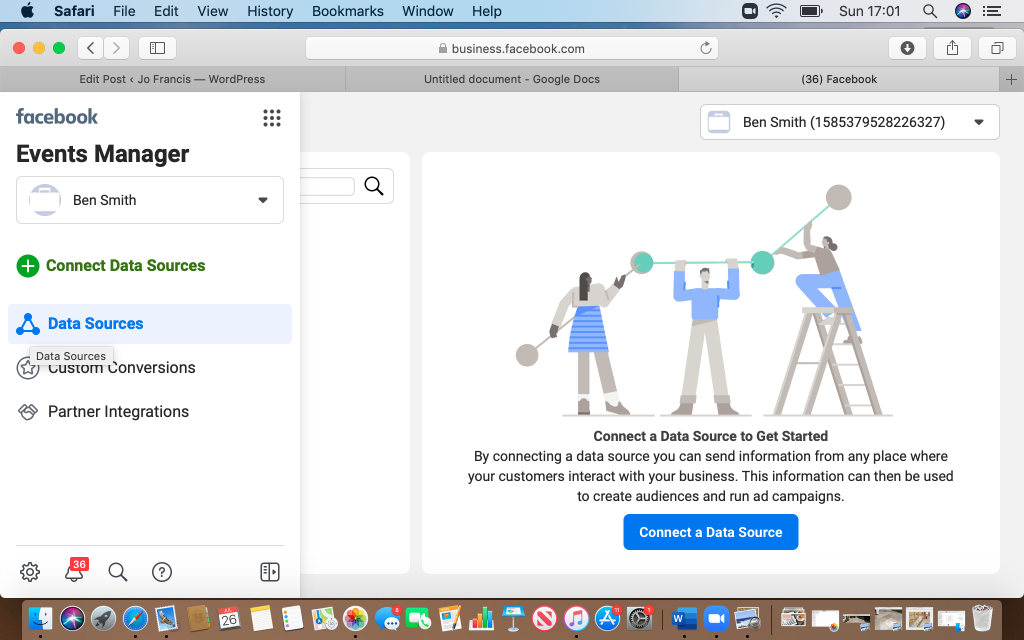
Once in Events Manager, head into Data Sources. And you need to click Connect a Data Source.
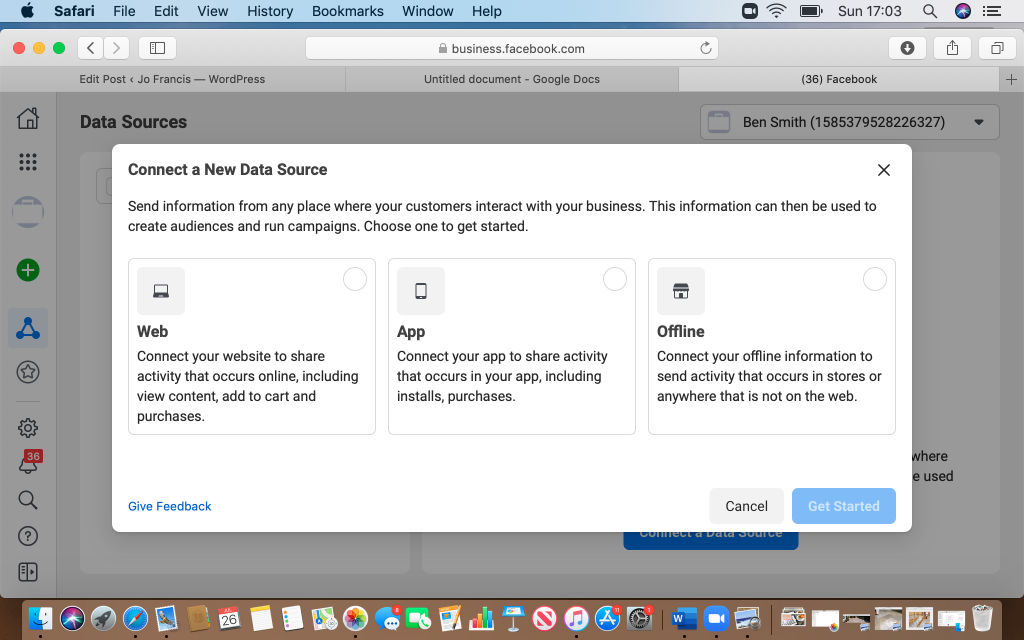
Then you are going to opt for Web, so click that then click Get Started.
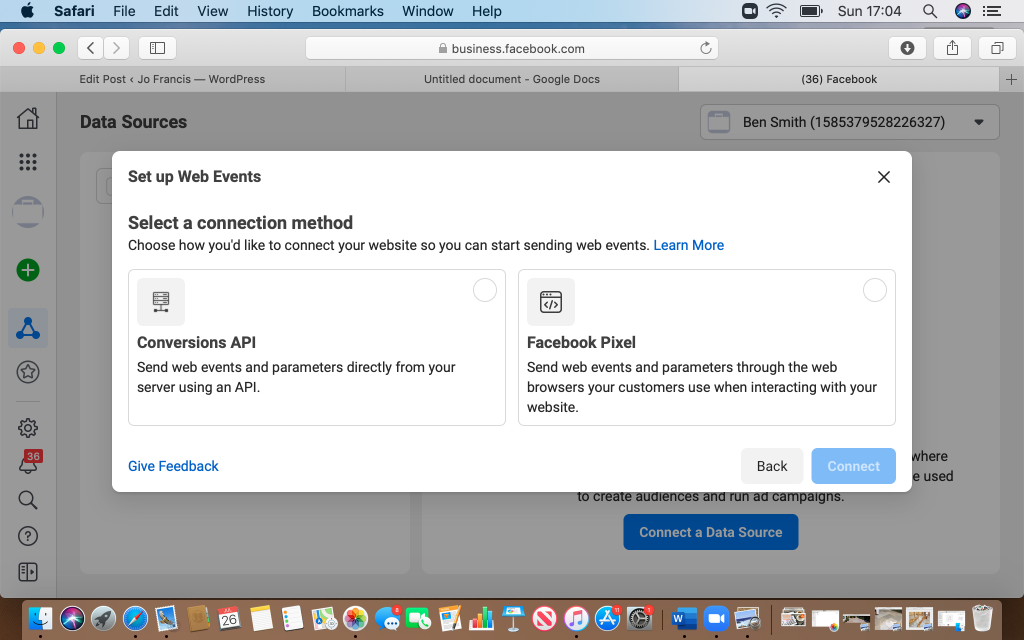
Then choose Facebook Pixel and click Connect.
Name your pixel and click continue. You can opt to run through a partner integration, but in this blog I am going to show you how to install the pixel yourself.
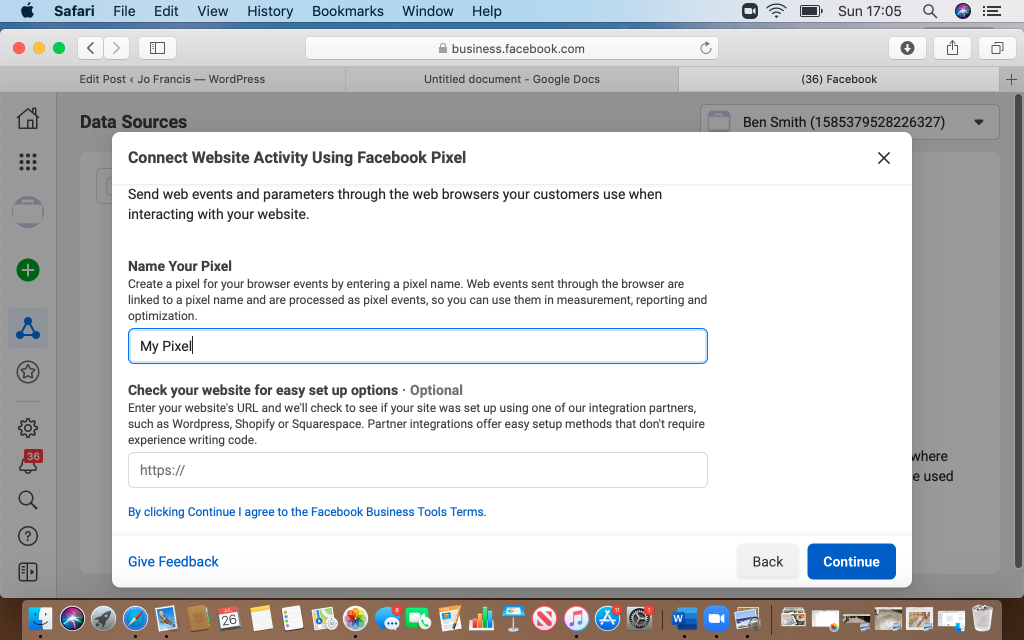
You will now see that your pixel is created and you reach the pixel installation page.
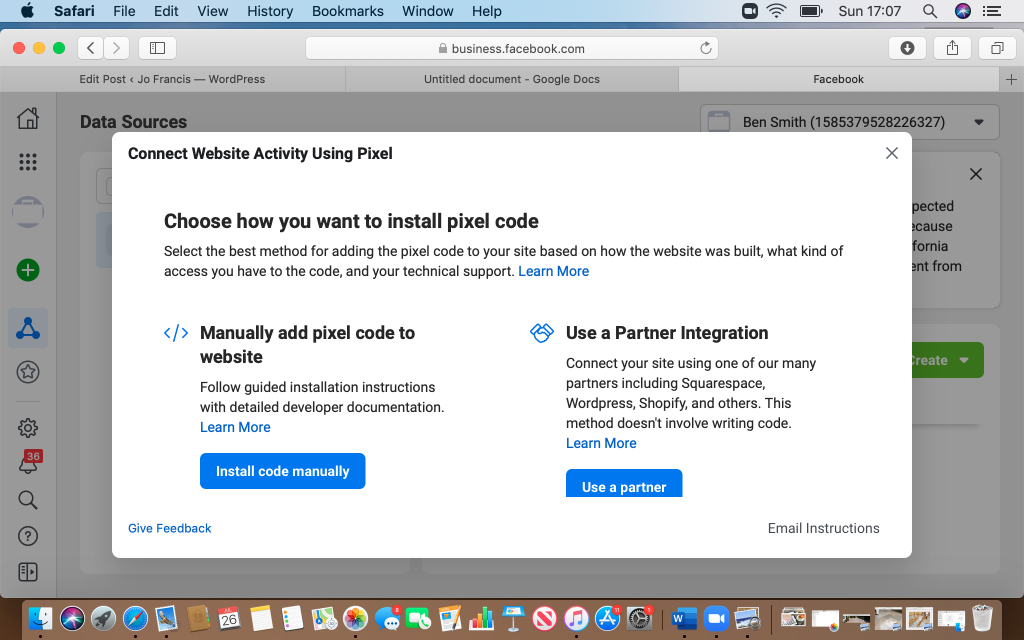
From this point you have two options, and which one you use very much depends on your website. The pixel code sits in the head tag of your website code, and in some instances you need the full code and in others you just need the pixel ID.
If your website requires the code, click Install code manually.
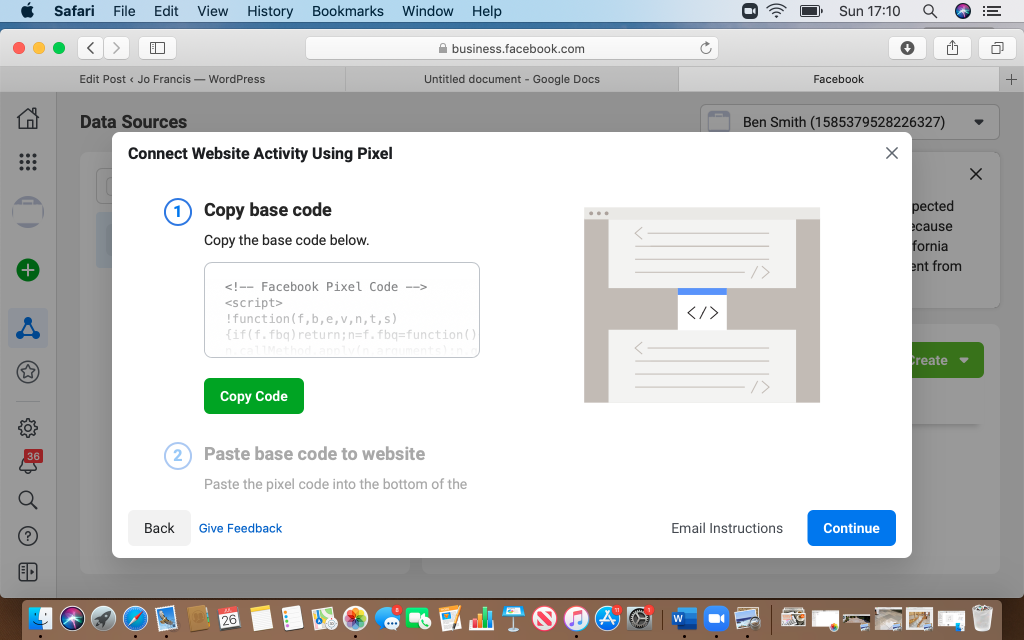
Click Copy Code to grab the full code for your pixel. You can hit Email Instructions if you want to email the code straight to your web developer / a techie friend.
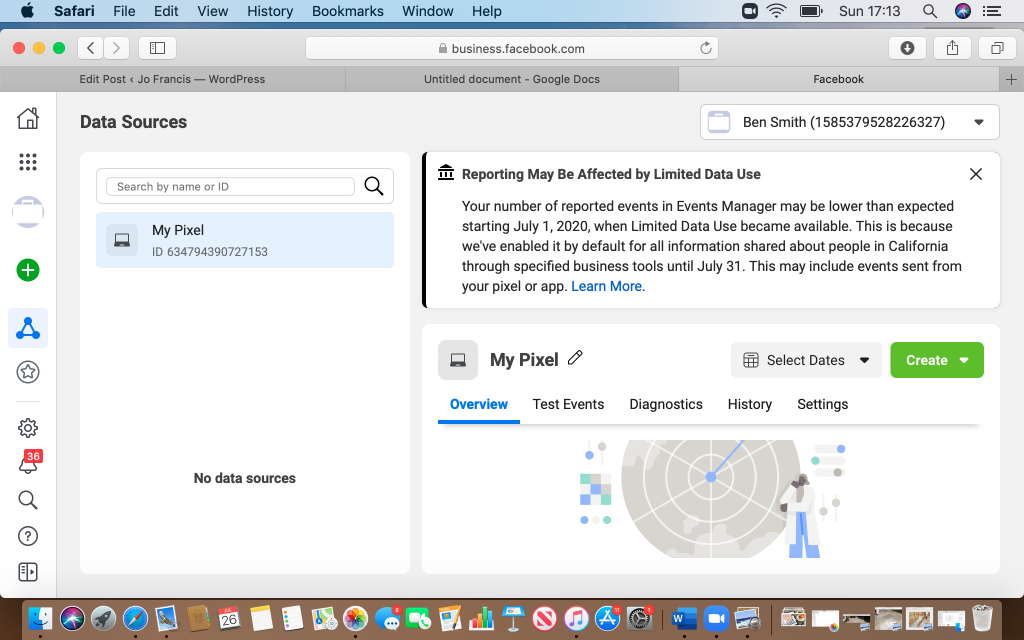
If you just need your pixel ID, click the X in the corner of the Facebook pixel installation box, and you will see your pixel (with whatever name you have given it) is available with an ID number.
How to install the Facebook pixel on your WordPress website
There’s many ways that you can add code snippets to WordPress, but one of the simplest methods is a free plugin called Insert Headers and Footers. Install and activate the plugin then go to Settings and Insert Headers and Footers and paste your Facebook Pixel code into the Scripts in Header box and save.
Even easier than that though, is to use a plugin that adds the pixel to every single page and post on your website.
Pixel Your Site is a great plugin for this. Again install and activate the plugin then go to Settings and add in your Facebook pixel ID and save. This will add the pixel across your site.
Check out the details in this blog on how you can check if the pixel is installed on your website.

How to install the Facebook pixel on non WordPress websites
I primarily work with WordPress websites, but over the months I have had clients with Joomla, SquareSpace and other websites, and I have always found the information for installing the Facebook pixel on these sites is readily available on Google. So to save you a job, here’s some handy reference points:-
- How to install the Facebook pixel on a Joomla website
- How to install the Facebook pixel on a SquareSpace website
- How to install the Facebook pixel on a Wix website
- How to install the Facebook pixel on a Shopify website
Also, if you’re using specific software for landing pages or email marketing, these links may be useful:-
- How to install the Facebook pixel on ClickFunnels
- How to install the Facebook pixel on LeadPages
- How to install the Facebook pixel on Kajabi
- How to install the Facebook pixel in MailChimp
- How to install the Facebook pixel in Keap
If installing your Facebook pixel still feels like a task that you’re not keen on, then it is a service I offer, and you can find out all about it here.
